Secure CRT User Guide
Secure CRT User Guide
Secure CRTmeaning
Secure CRTIs a supportSSH (SSH1 and SSH2)Terminal emulation program forWindows、Macand LinuxThe client is the host's software.Secure CRTsupport SSH, while supportingTelnetand rloginprotocol.
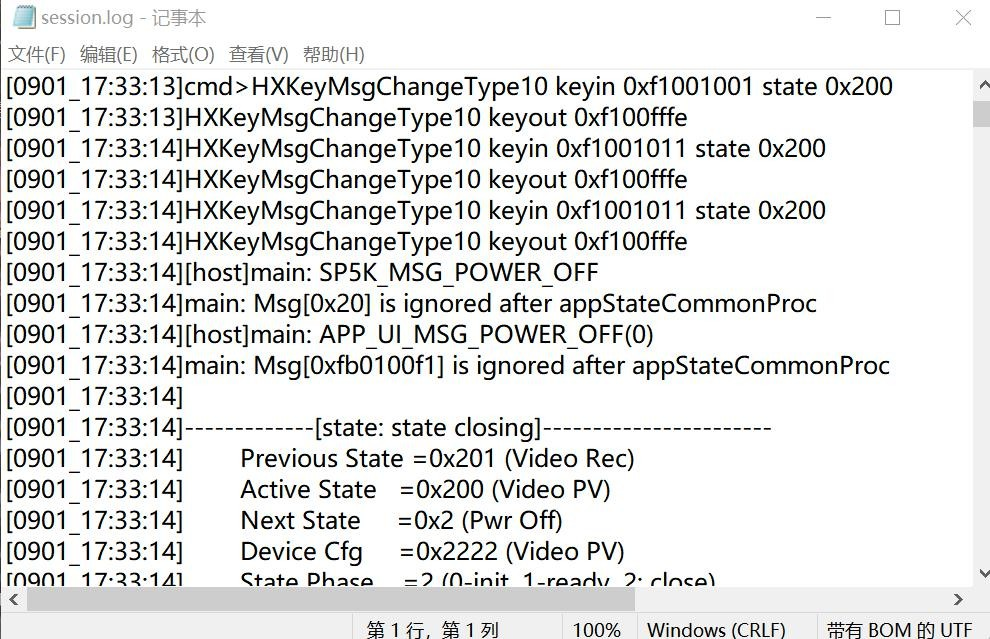
We mainly use this toolSerialprotocol to view the work log of the camera operation and to facilitate the location of defects in the tracing software.
one,Secure CRTDownloads
Secure CRTYou need to download from the official website.Official website download addressas follows:
https://www.vandyke.com/cgi-bin/releases.php?product=securecrt
two,Secure CRTInstallation
Download and installation website:
https://blog.csdn.net/qq_39052513/article/details/100272502
3. Debug serial port (Secure CRT)Building Instructions
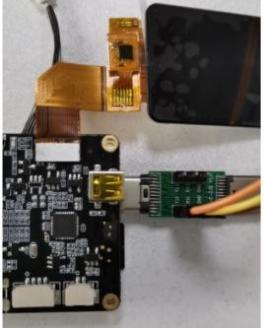
Conditions of use: One computer,G1 Public version (Camera motherboard+sensor module), use the company specifiedtype-CAdapter Plate(TYPE-C-ZJB V1.0), serial port board.
For the first time use, you need to install "SecureCRTPortable.exe”Serial port tool. Note: Install the corresponding tool according to the type of computer system used, 32-bit or 64-bit.
The machine is powered on and the serial port boardGND、RXD、TXD Connect totype-CAdapter PlateGND、TX1、RX1 Location.type-CPlug the adapter board intoG1MotherboardType-CInterface location. Read the port in the computer "Computer" "Management" "Device Manager", such as:COM3, as shown below:


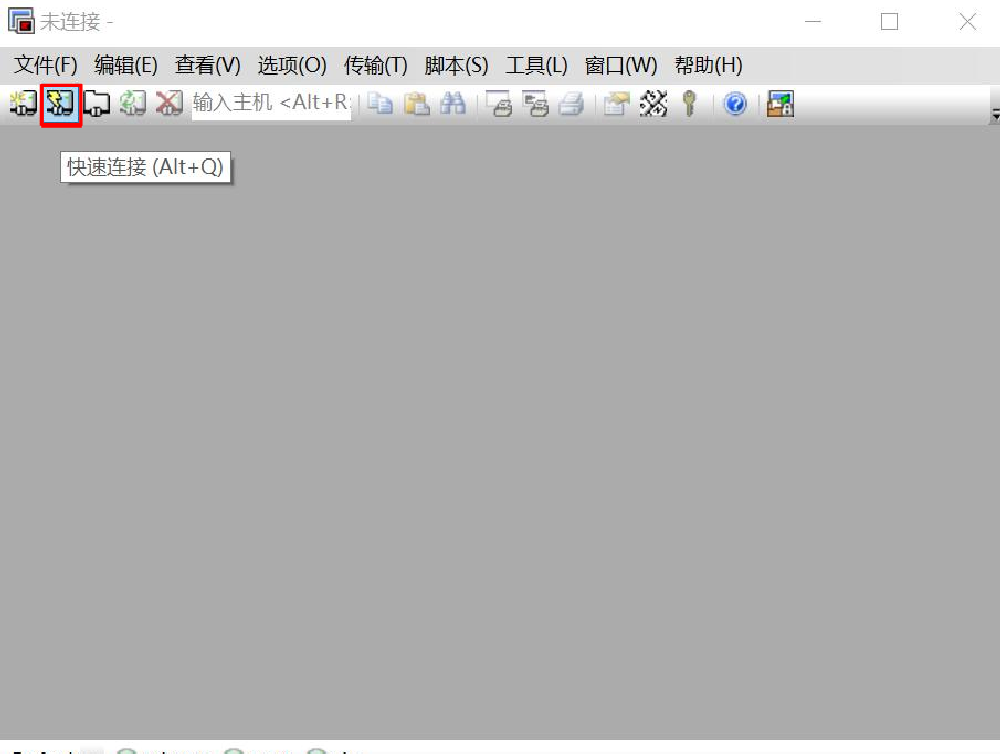
1. After setting up according to the above requirements, open the installed Secure CRTWhen using the tool for the first time, click the "Quick Connect Icon" (as shown in the figure below) to quickly add the port number identified on the computer.Serial with:
2. In the Quick Connection window, select "Serial”:
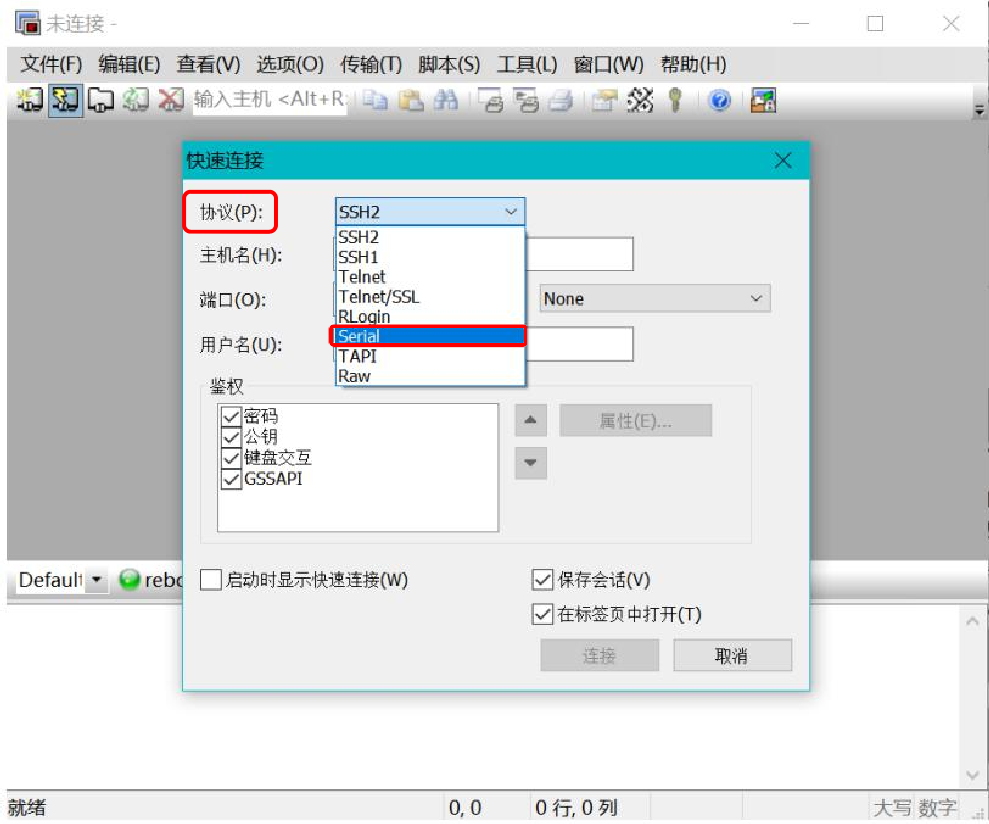
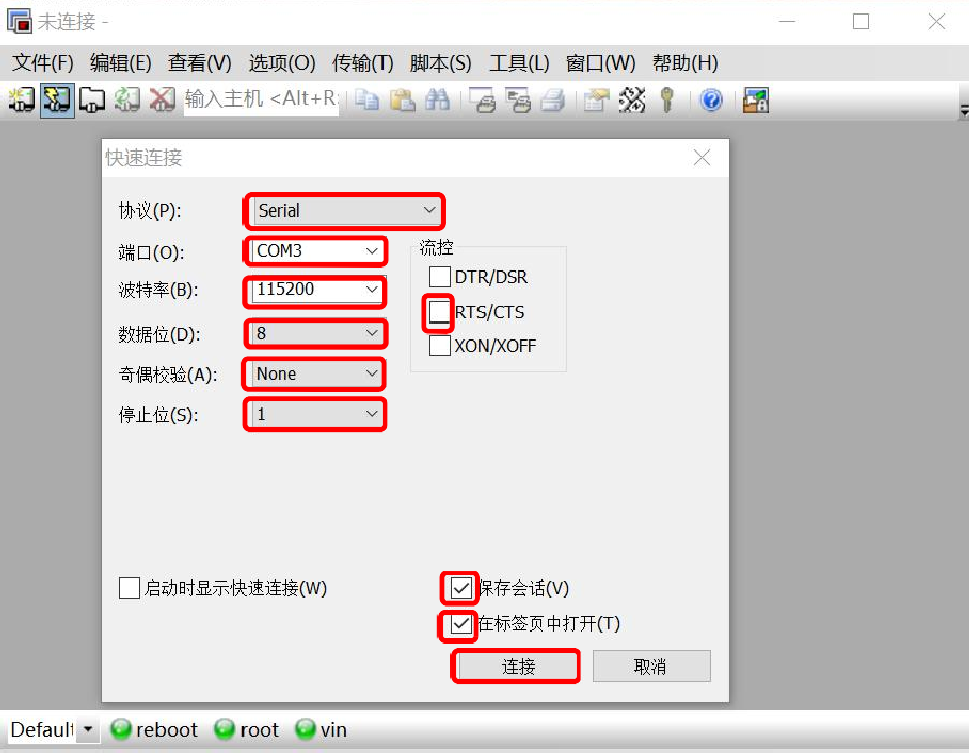
In the window that pops up again, select the option marked in the picture below. Then click Connect to enter the log display interface.
Special Note: The port is selected according to the port number recognized on the computer.
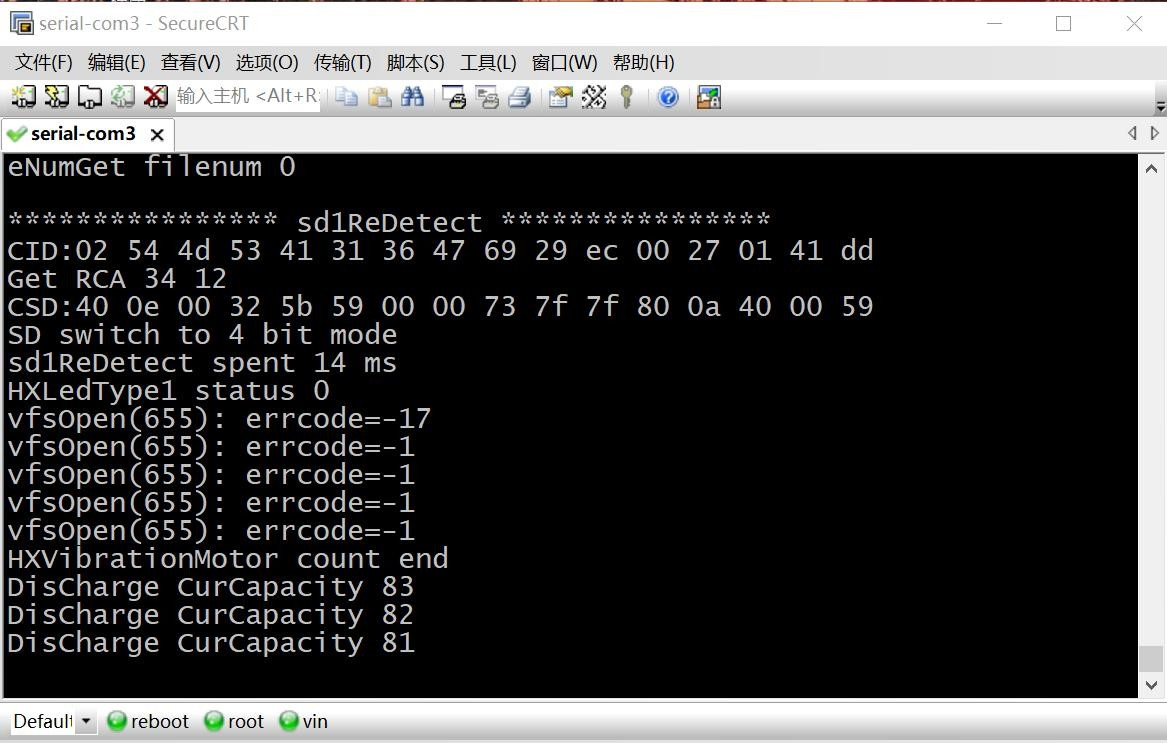
3. Display CRTSerial port log interface:
4. How to automatically save logs and print them
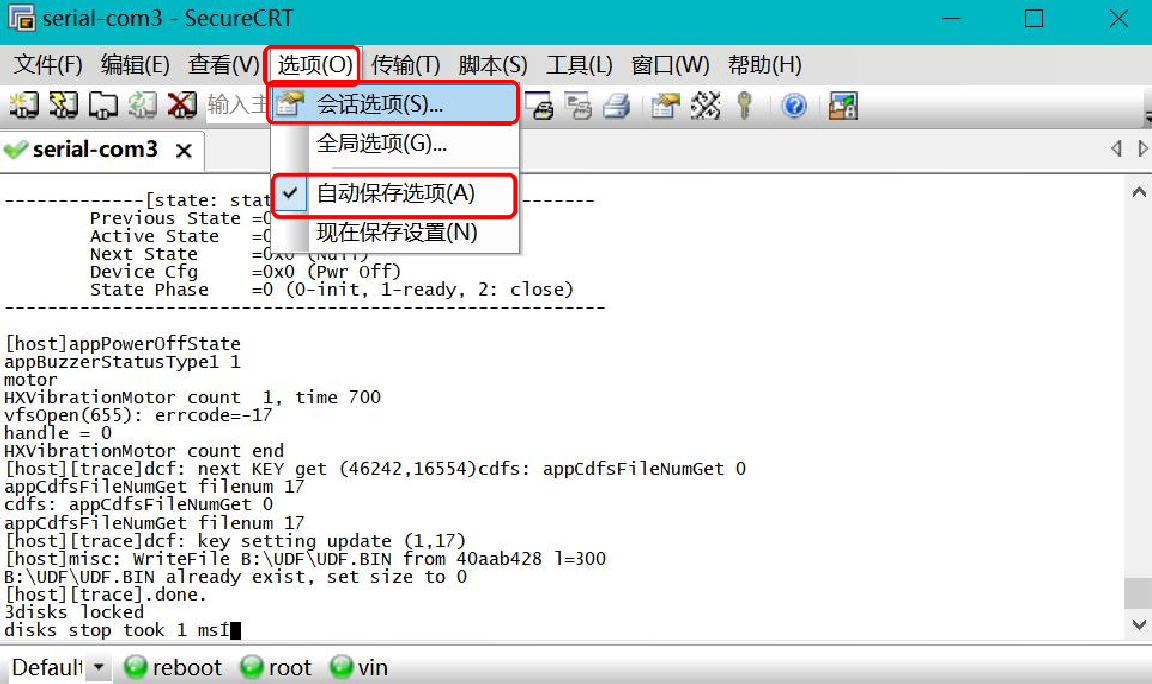
1. Click "Options" in the menu option bar, check "Auto Save Options", and then click "Session Options" in the drop-down bar:
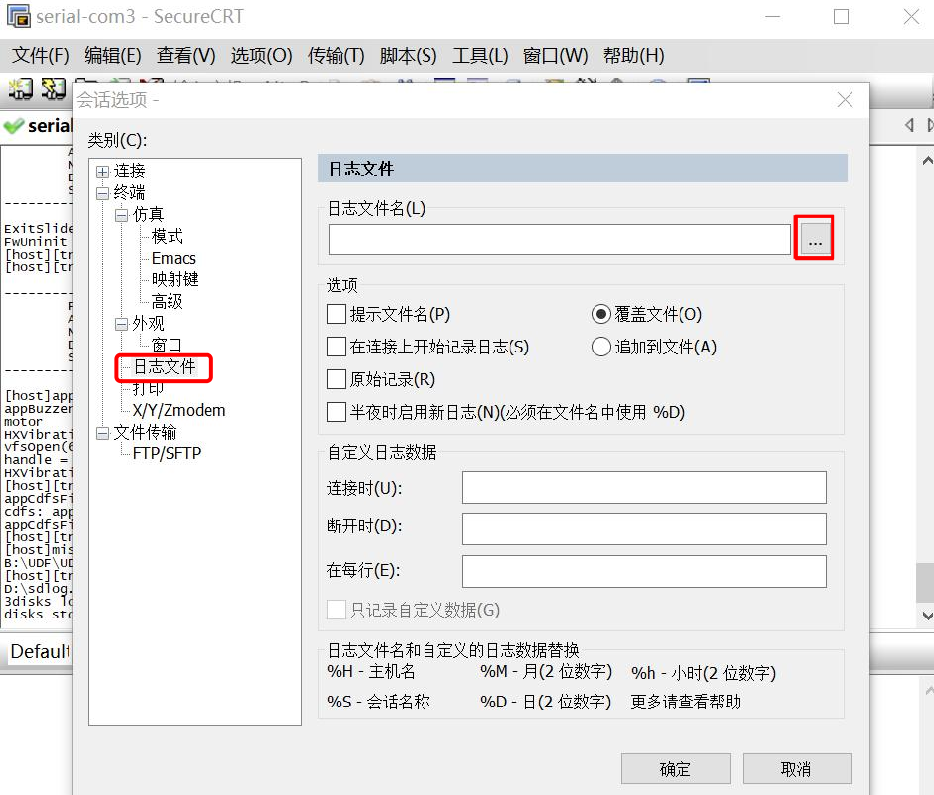
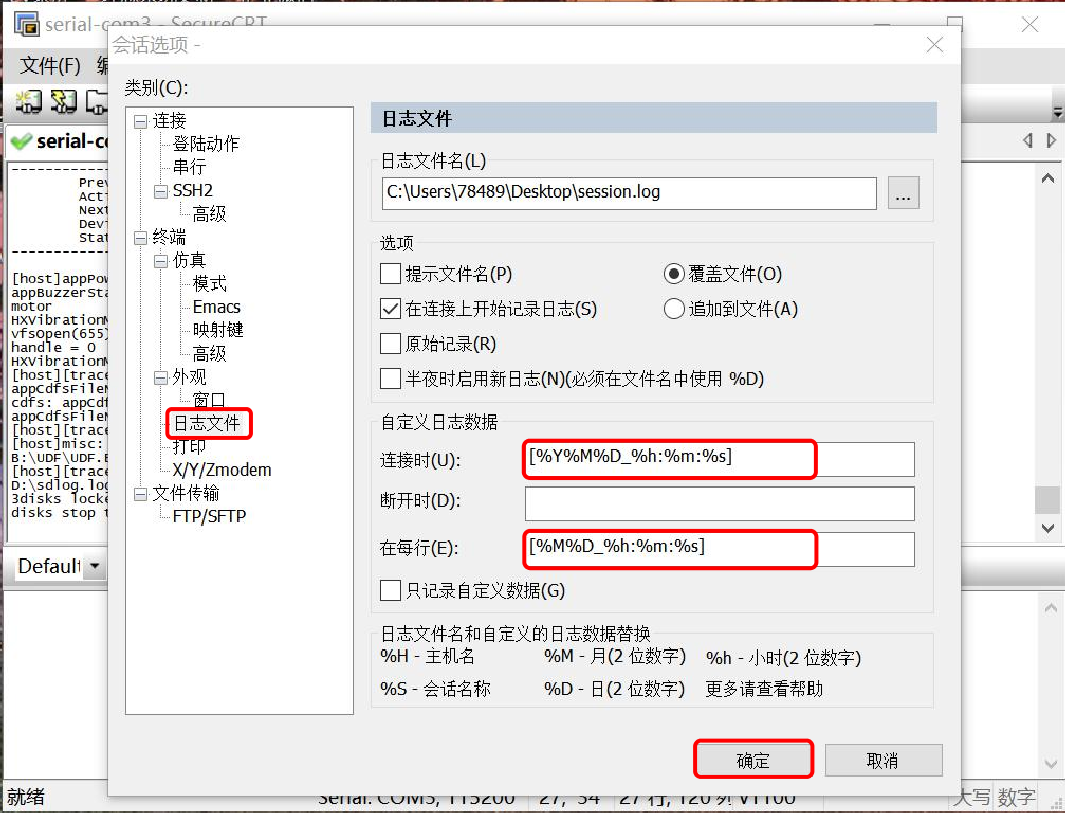
2. In "Session Options", click "Log File" in the "Category" column:
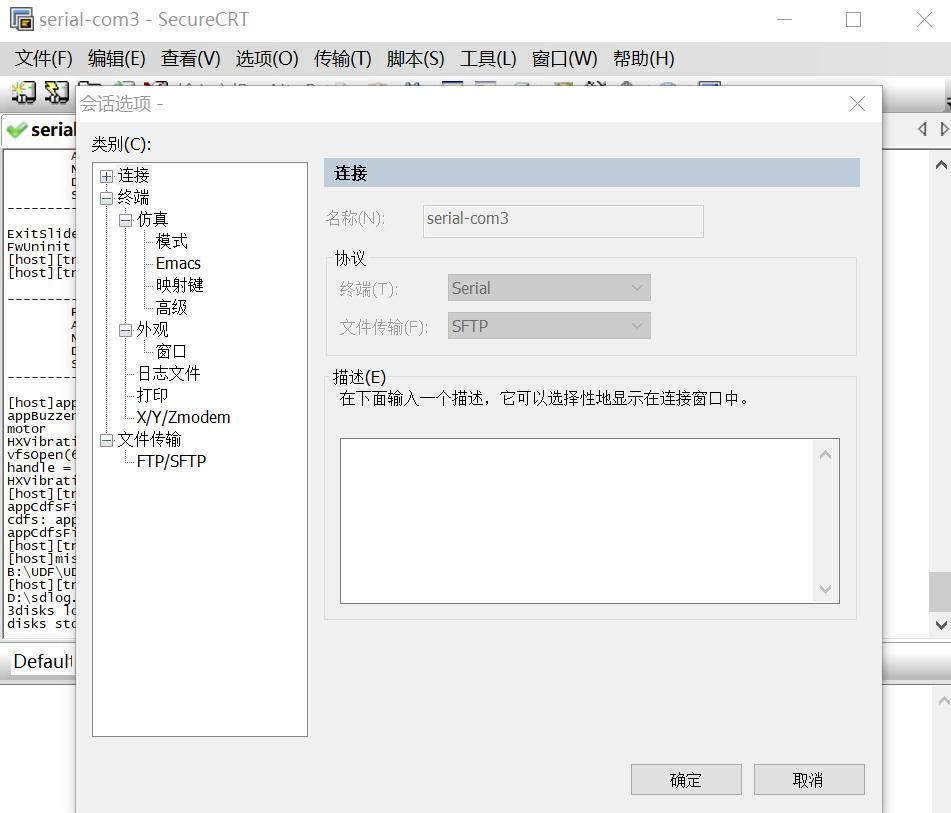
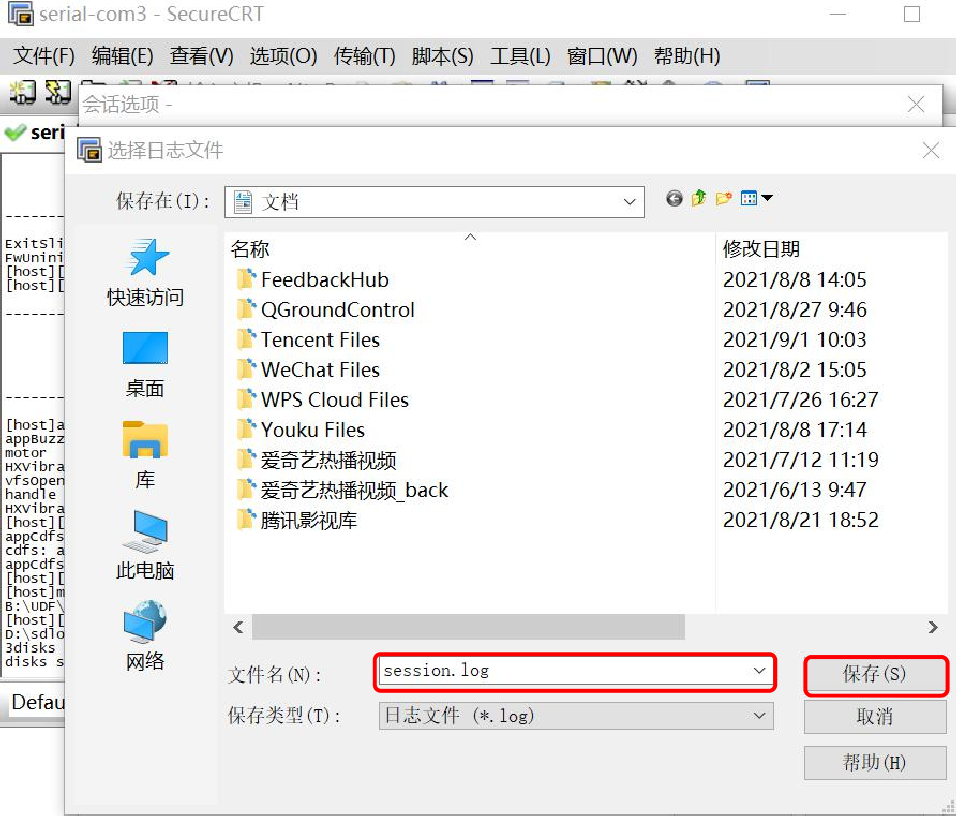
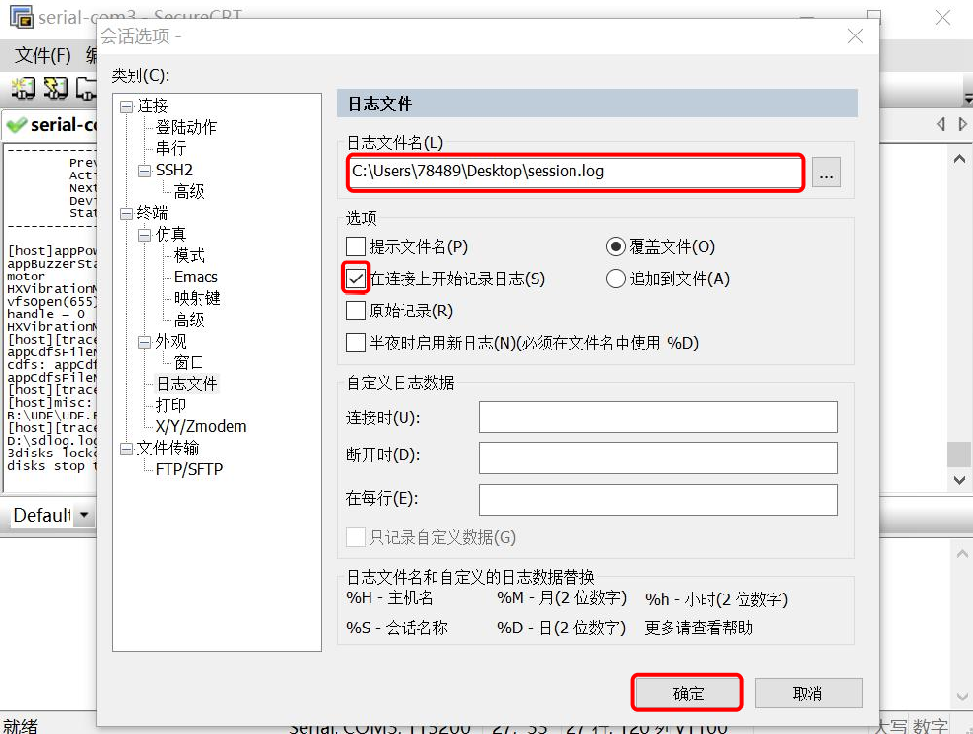
3. In the "Log File Name" column, click the "dot" icon on the right and selectlogSave the path and rename the file name. After setting, click "Save" to print.log The log is saved to the set path location.
Note: You need to check "Start logging on connection" in "Log File" → "Options" to automatically save the log when you open the serial port interface. logAfter completing the settings, click "OK".
4. Printed logAdd time and date display:
Click Options again, select "Session Options", click "Log File", and enter the content marked in the following figure in "Custom Log Data". After the settings are completed, click "OK". For example:
When connected(U):[%Y%M%D_%h:%m:%s]
In each line(E):[%M%D_%h:%m:%s]
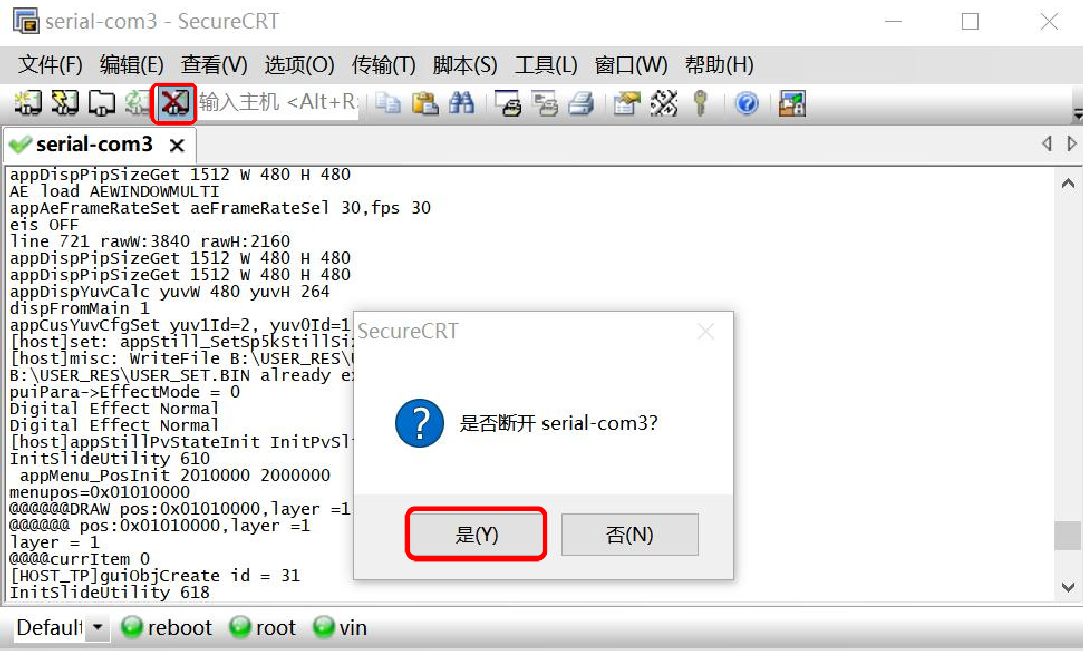
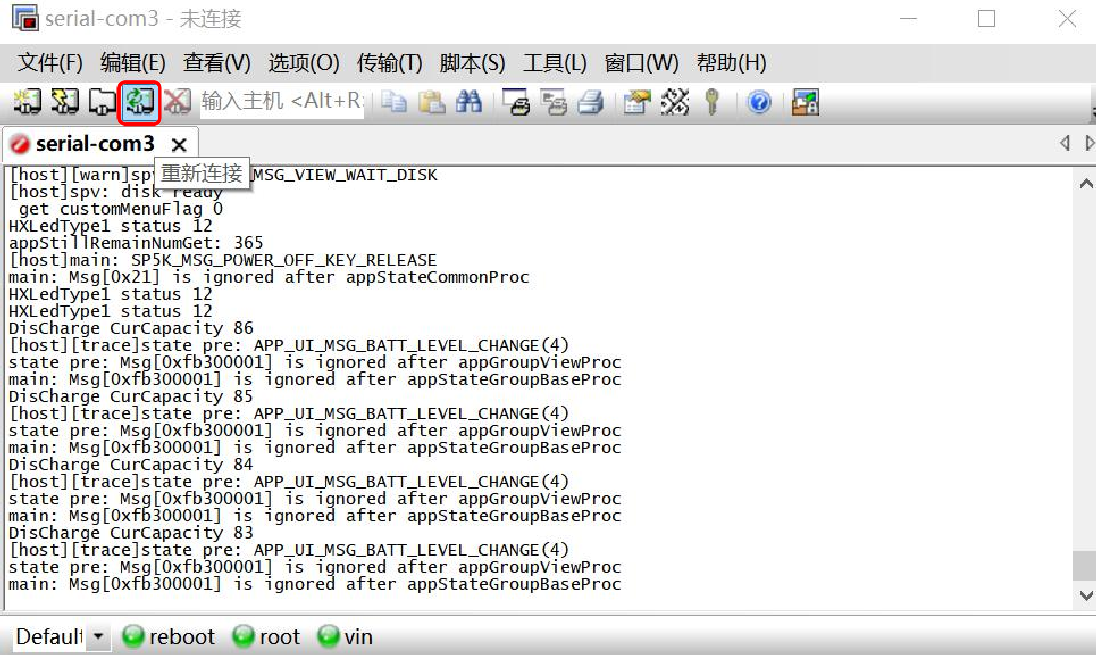
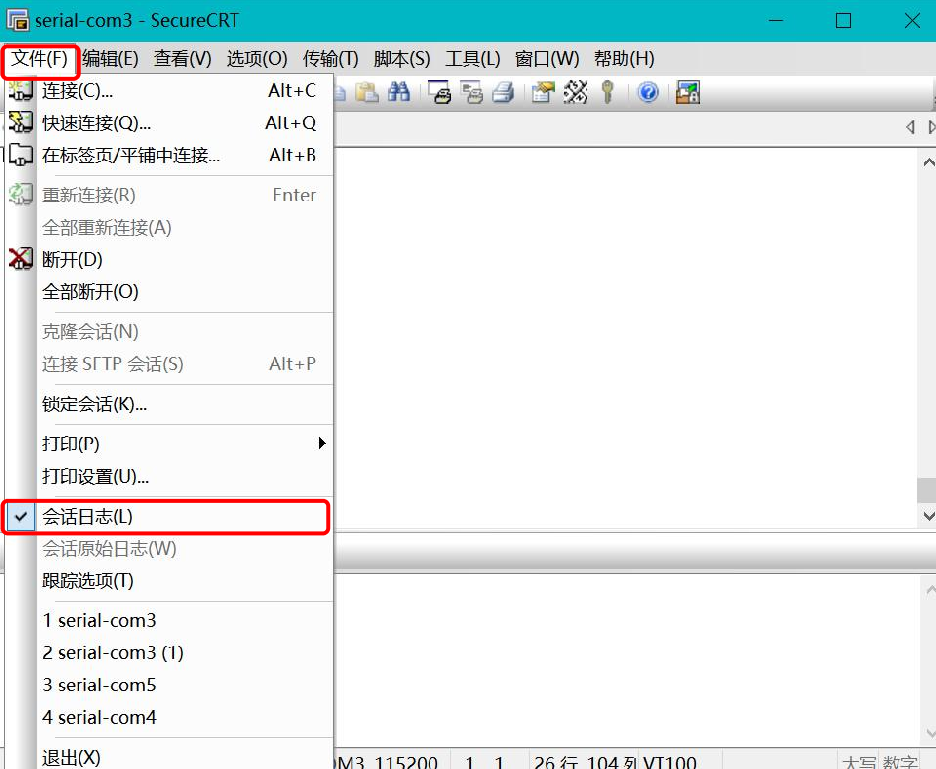
5. Click the "Disconnect" icon, click "Yes" in the pop-up prompt box; click Reconnect; then click "File", and in the menu drop-down bar, check that "Session Log" is checked, indicating that it has been saved.loginformation.
6. Under the path where the settings are saved, check the saved loginformation.