MobileCam APP User Guide
MobileCam APP User Guide
 MobileCam APPIt is a matchHuaxing VideoThe company launched a wirelessWIFIFunctional SeriesG1Camera moduleUsedAPP. Support useAPmode (point-to-point connection, LAN network) orSTAMode (hotspot mode\streaming mode).
For Android phonesMobileCam APP,Click to download; For the APP used by IOS mobile phones, please search "AiKUCAM" in the app store to download it.
2. Connect the G1 camera moduleWiFi
If you are using the G1-W-V3.0 wifi board,When the camera module is powered on, short press the Wifi button on the Wifi board to turn the Wifi function on and off;
If you are using the G1-W-V6.3 wifi board,When the camera module is powered on,You can press and hold the motherboard's camera button for 3 seconds, turn the Wifi function on and off;
The red light flashes when Wi-Fi is turned on, and the red light is always on after the connection is successful.
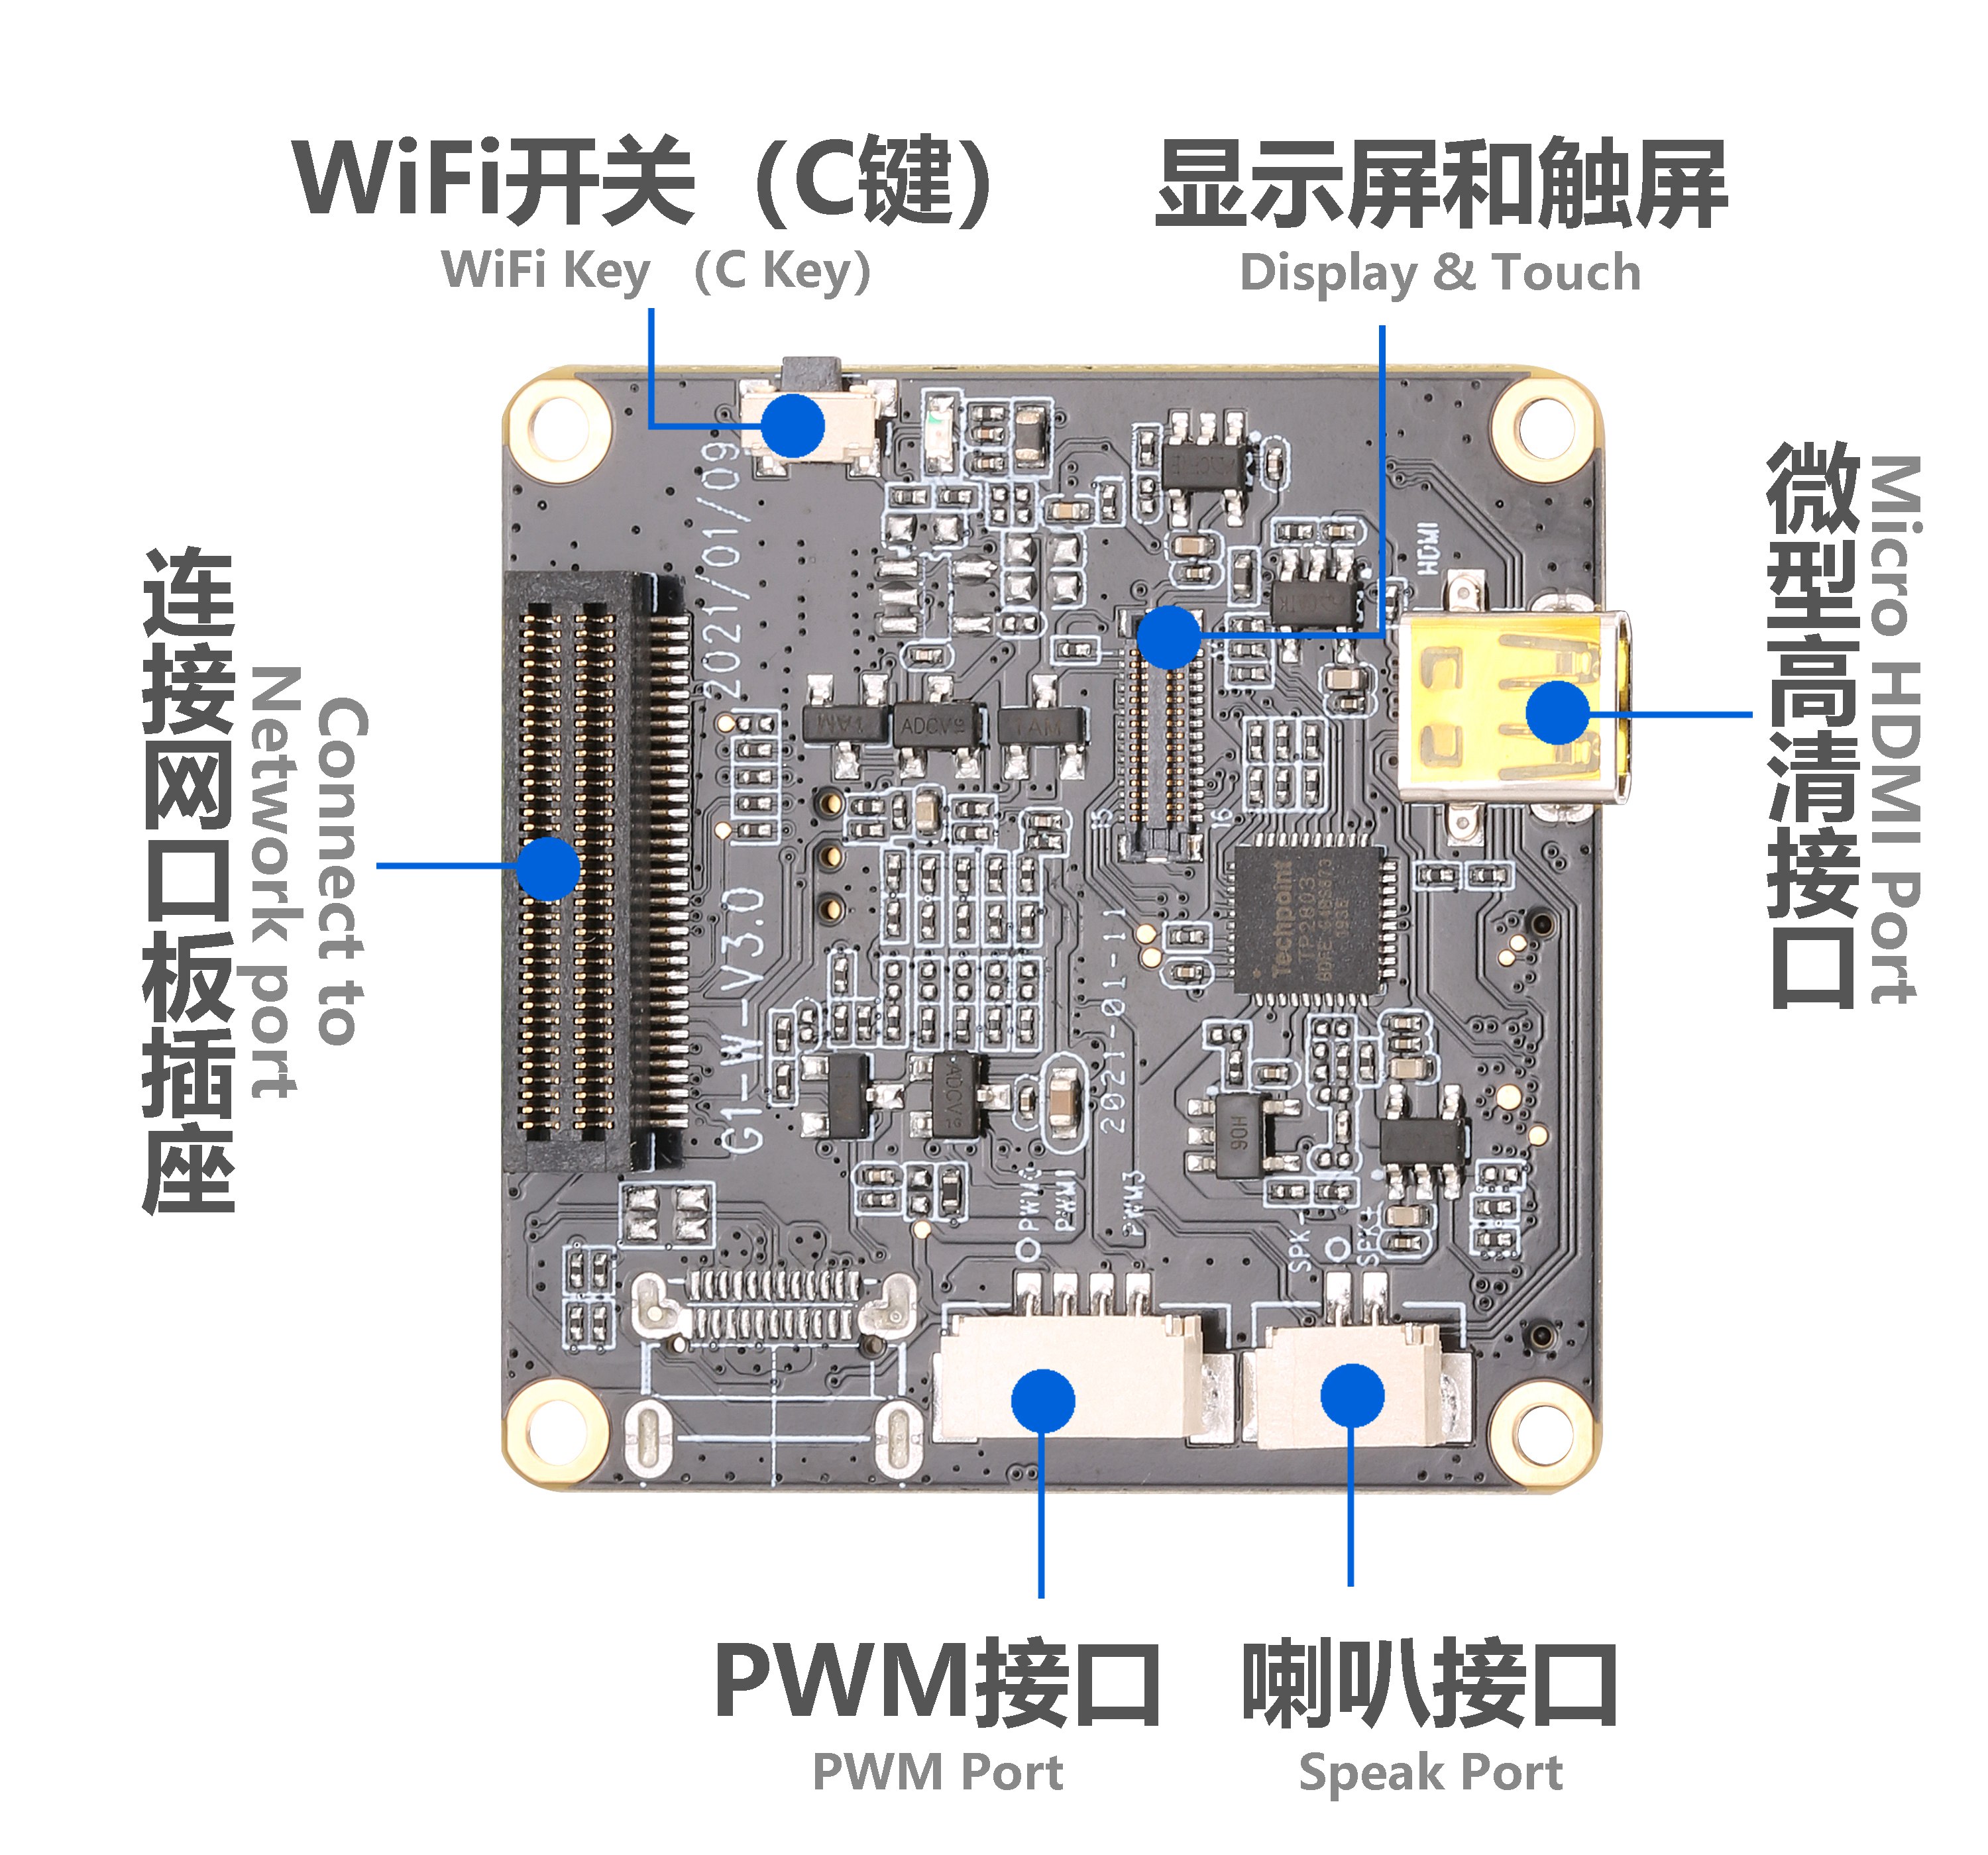
▲G1-W-V3.0 wifi expansion board
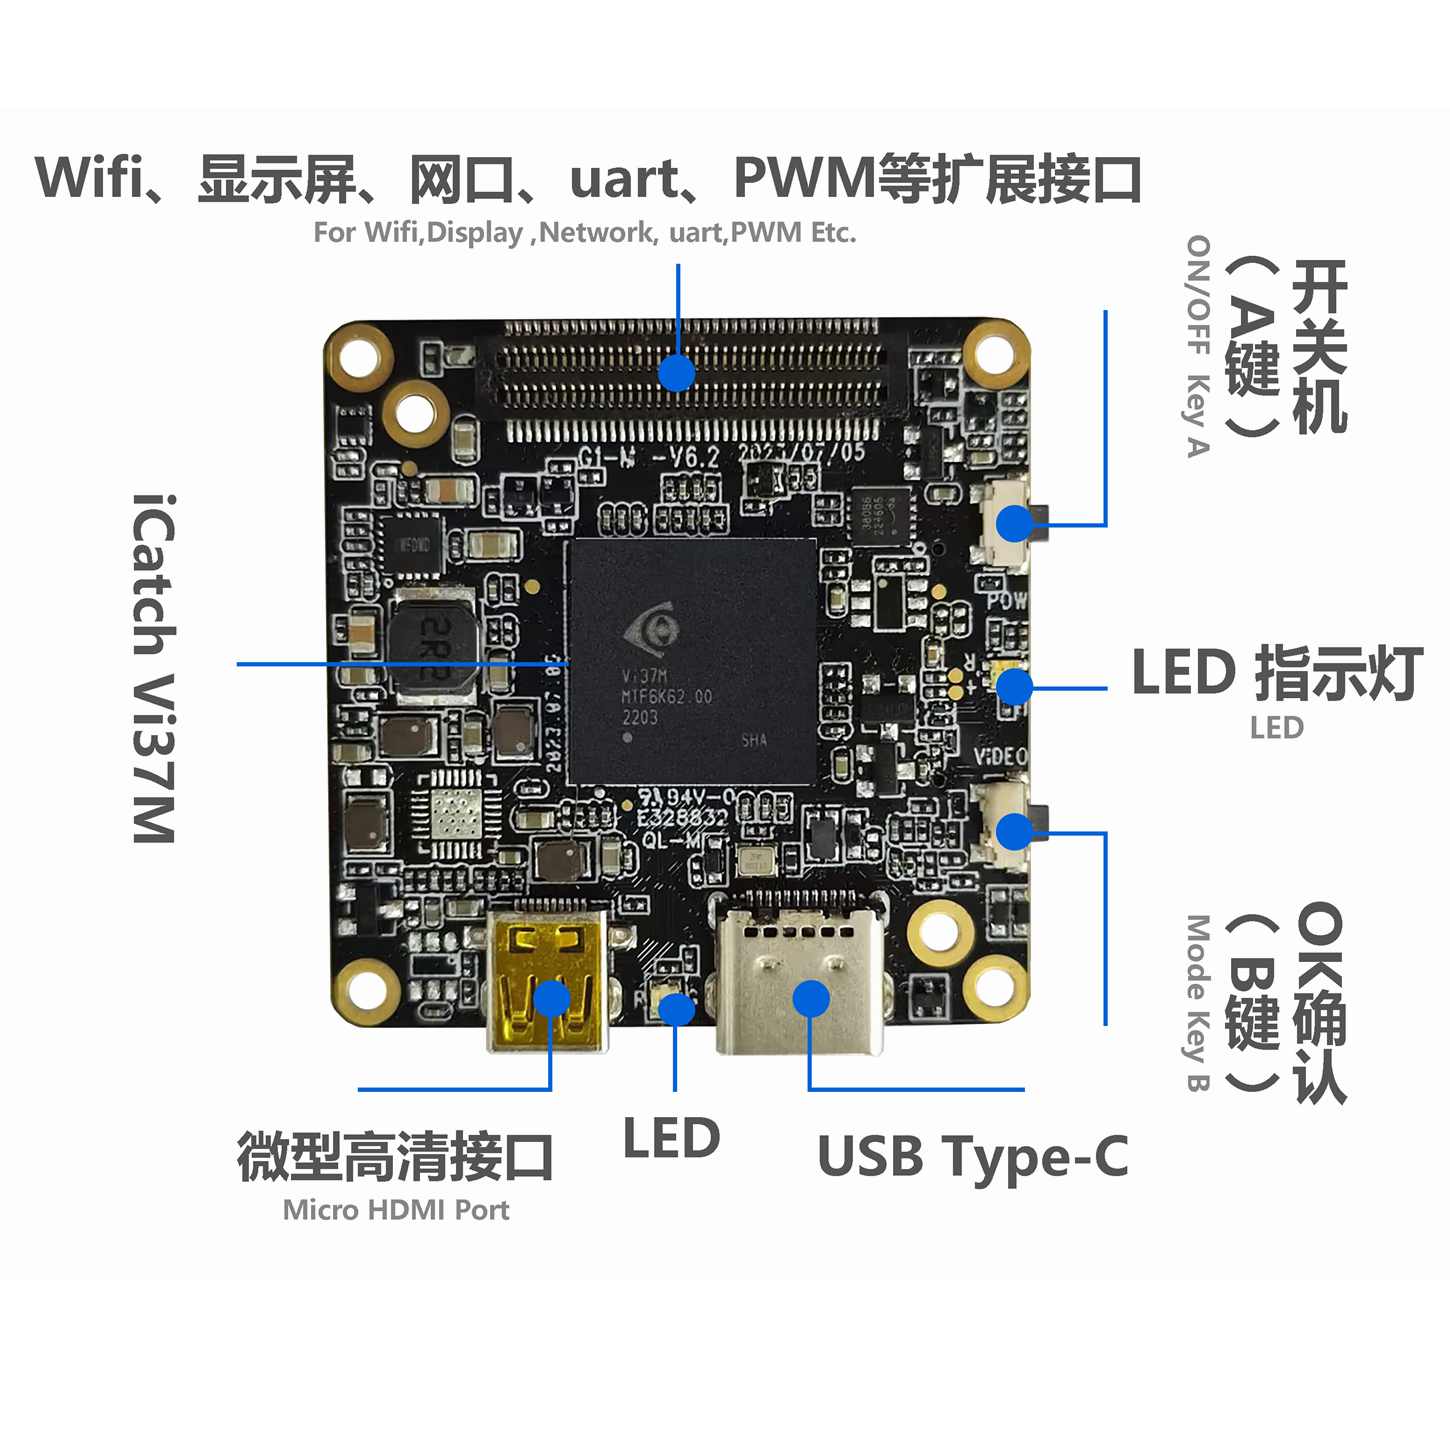
▲G1-M-V6.2 camera motherboard
Open your phone'sWLAMSearch for camera modulesWiFiName, such as "G1A0_XXXX” (subject to the actual model used), enter the initial password "12345678", then click Connect on the phone to successfully connectWiFi.at this time,WiFiThe indicator light on the board is always red.


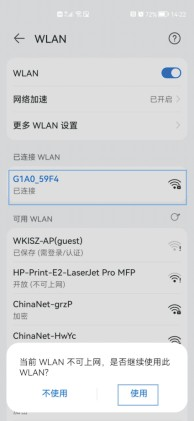
Note: G1 camera module with wfii board, the default isAPmode. When the phone pops up the following prompt box "WLANUnable to access the Internet, do you want to continue using thisWLAN?” Click to use; otherwise, you cannot useAPP。
3. APP interface view description
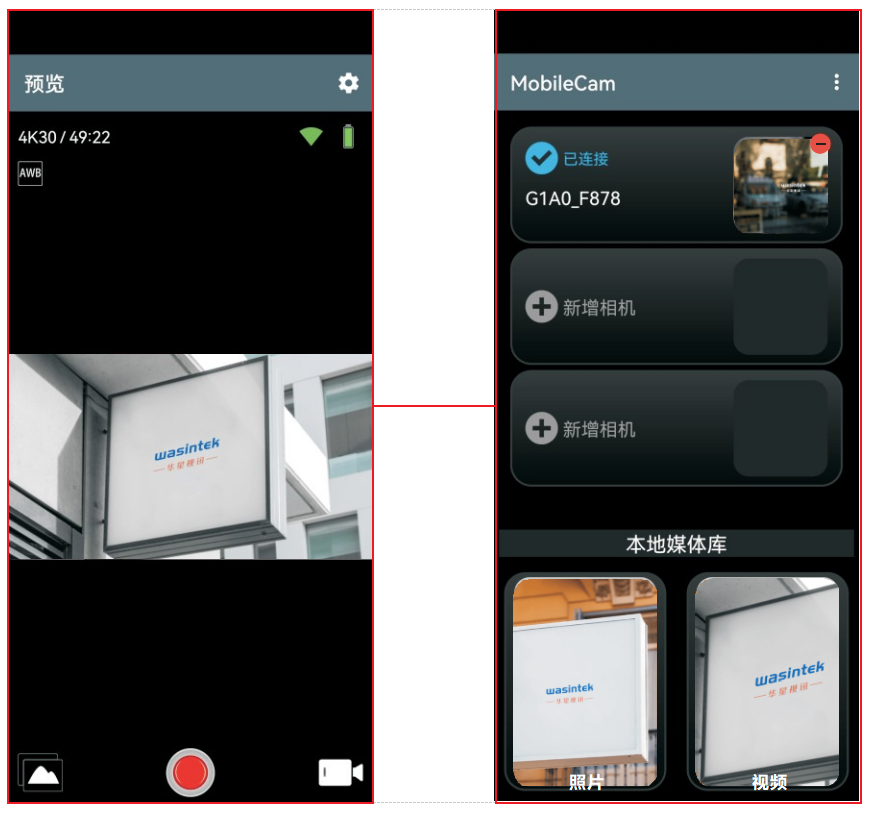
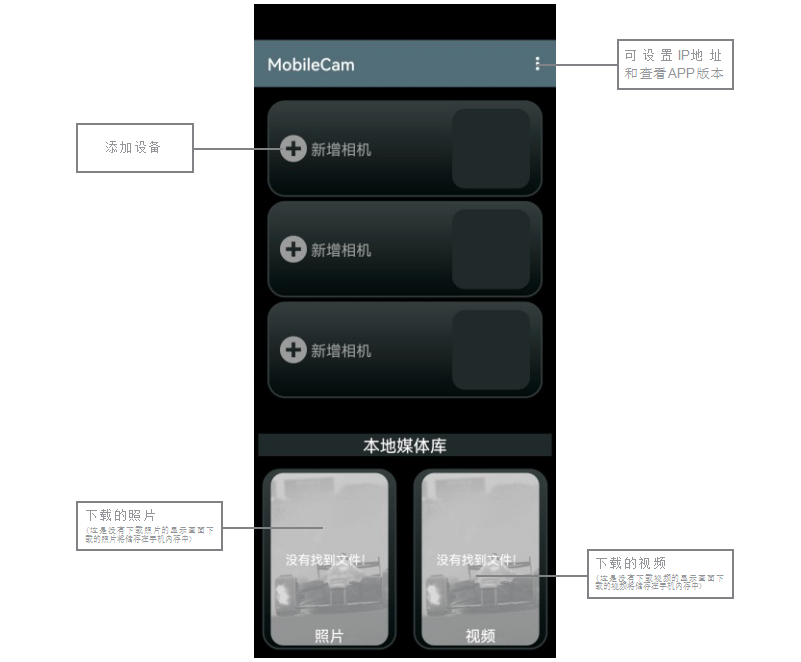
Install on Android phoneMobileCam APPThen, click to enter the application and enter the operation interface:
APPSupport horizontal screen, when the phone turns on the screen rotation function, place the phone horizontally orPadThe operation interface will be displayed in horizontal mode, and the operation method is the same as that in vertical mode. Here we will introduce it in vertical mode.
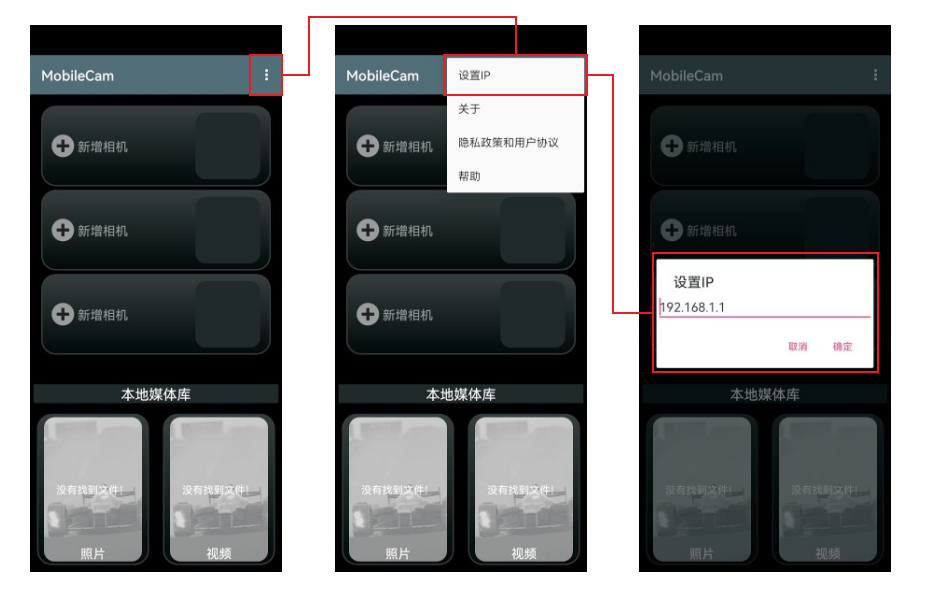
Special note: CarryingwifiBoard, openwifiWhen using the function,APPSettingsIPThe default setting is "192.168.1.1", as shown below:
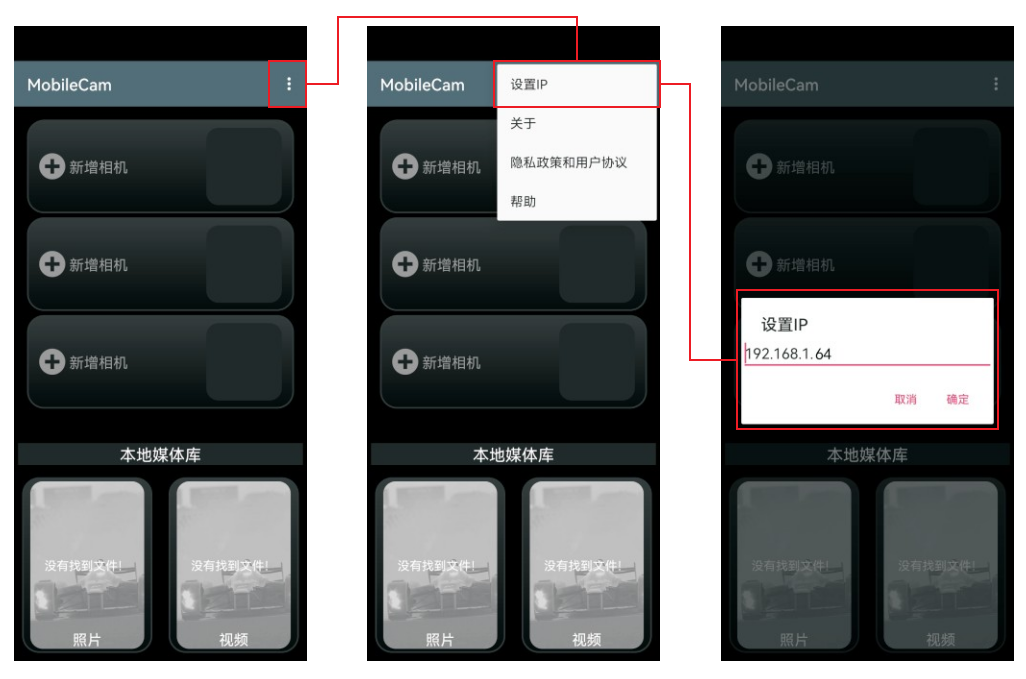
Special note: When using with an Ethernet port board, the APP settingsIPTo set the default to "192.168.1.64", as shown below:
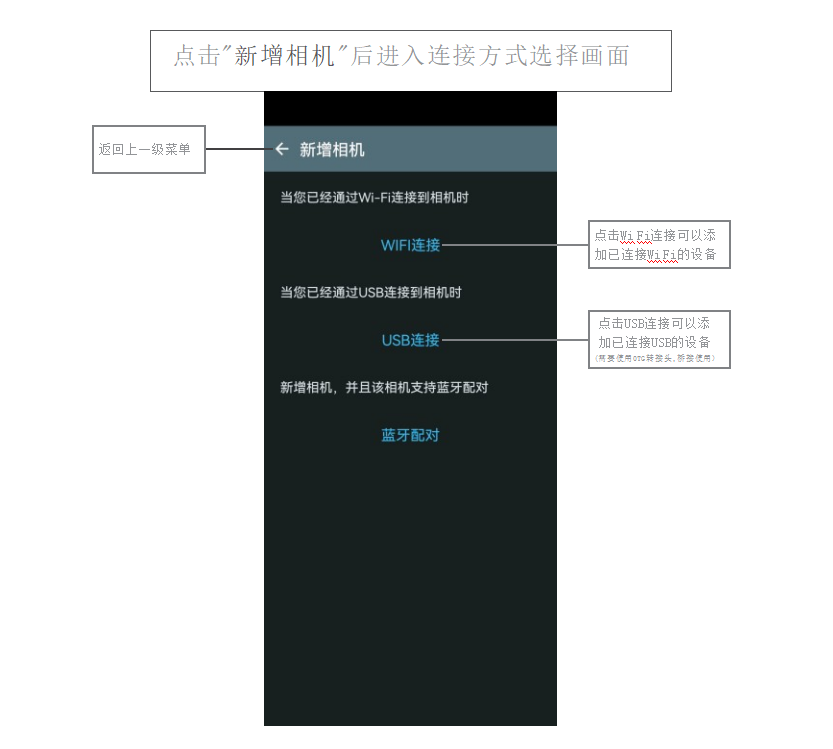
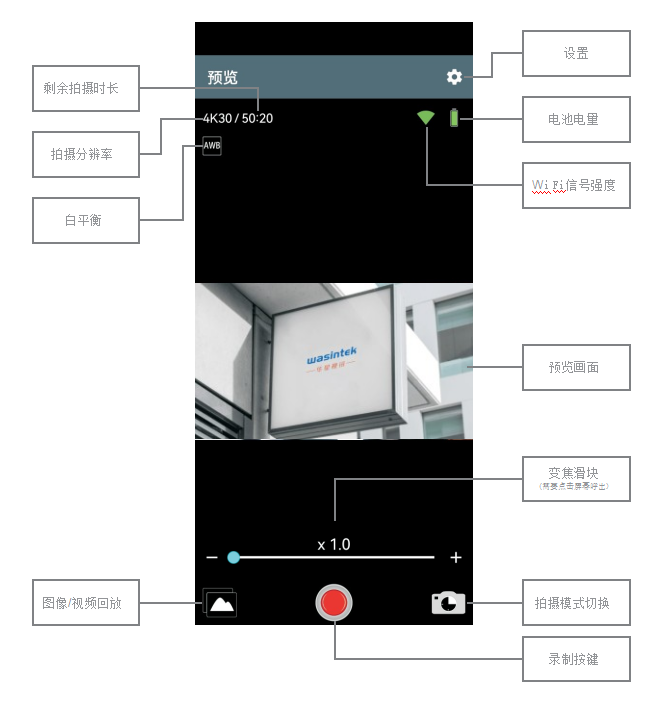
After connecting the camera, it will enter the video recording mode by default and display the preview screen:
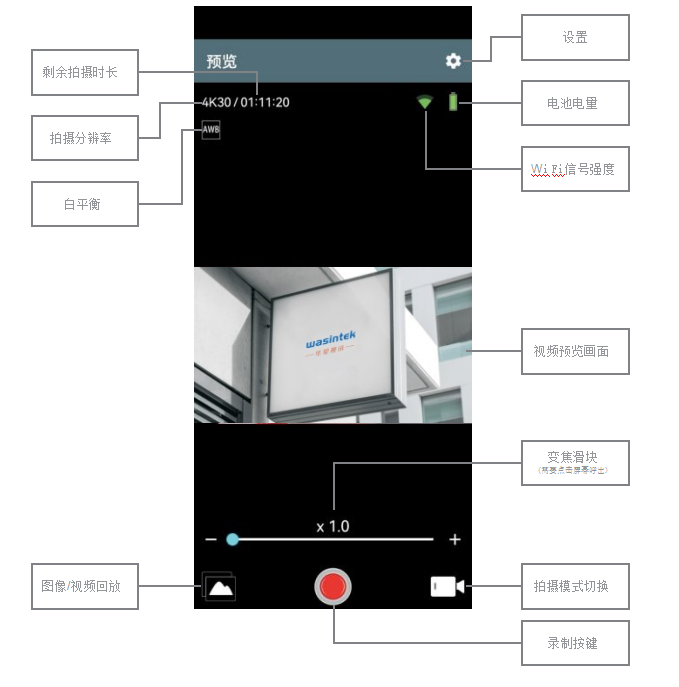
Click the icon in the upper right corner of the screen to enter the "Video Settings" interface, where you can set video resolution, white balance, timestamp, image stabilization, power-on recording, format, view device version number, viewAPPVersion and other functions.
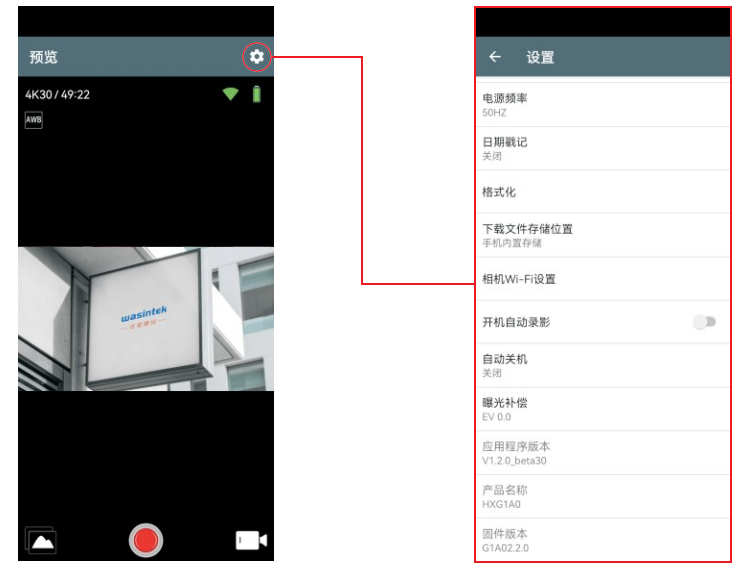
Note: The actual functions may vary depending on the expansion board used; please refer to the corresponding product specifications for details. The actual use shall prevail.
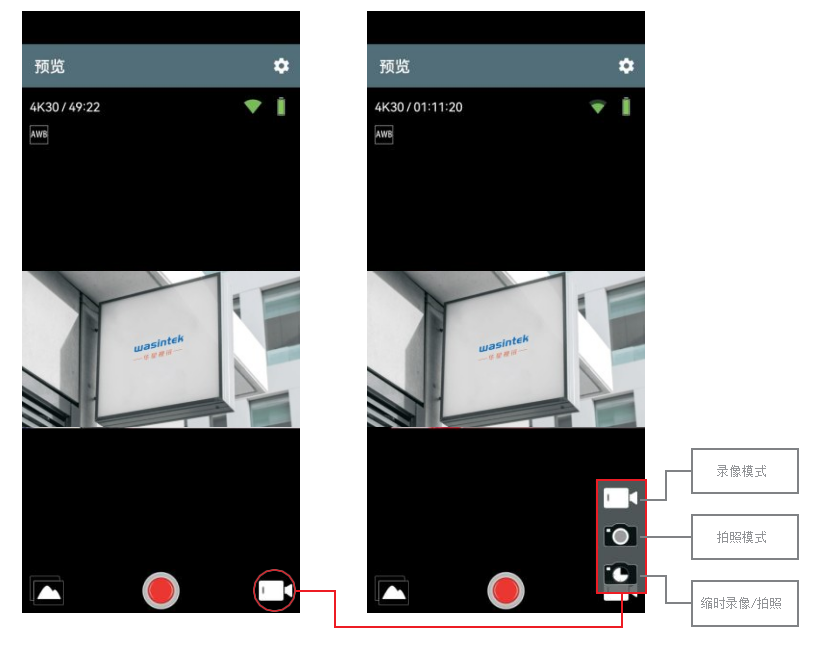
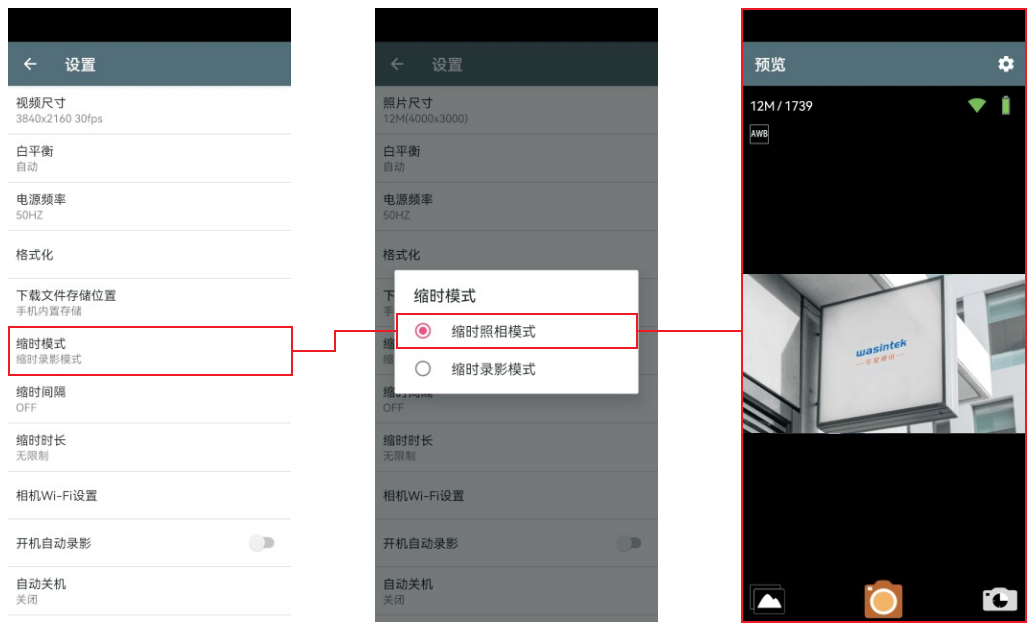
Switch mode: In preview mode, click the video icon in the lower right corner of the screen to switch modes, video mode/photo mode/time-lapse video mode, time-lapse photo mode (after selecting time-lapse mode, time-lapse video mode is selected by default, you need to enter the settings item and change it to time-lapse photo mode).
Click Mode to switch to Photo mode:
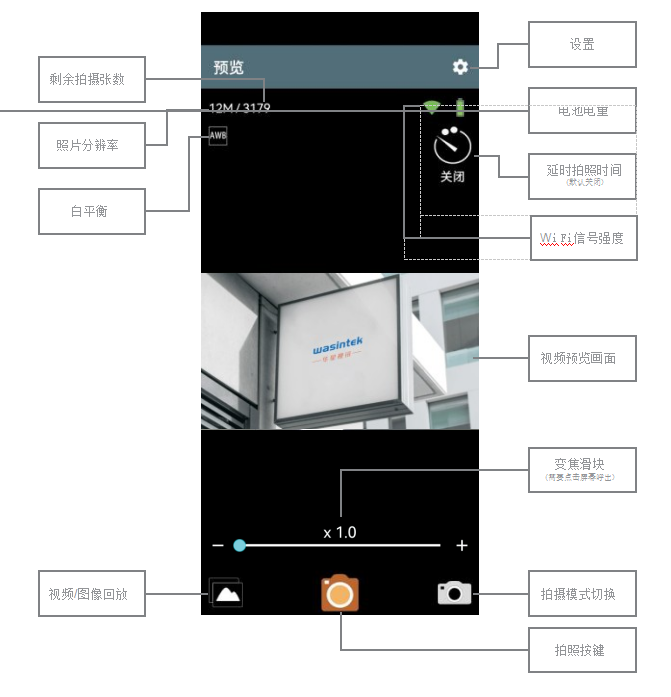
Click the icon in the upper right corner of the screen to enter the "Photo Settings" interface, where you can set image size, white balance, date stamp, start recording, format, view device version number, viewAPPVersion and other functions.
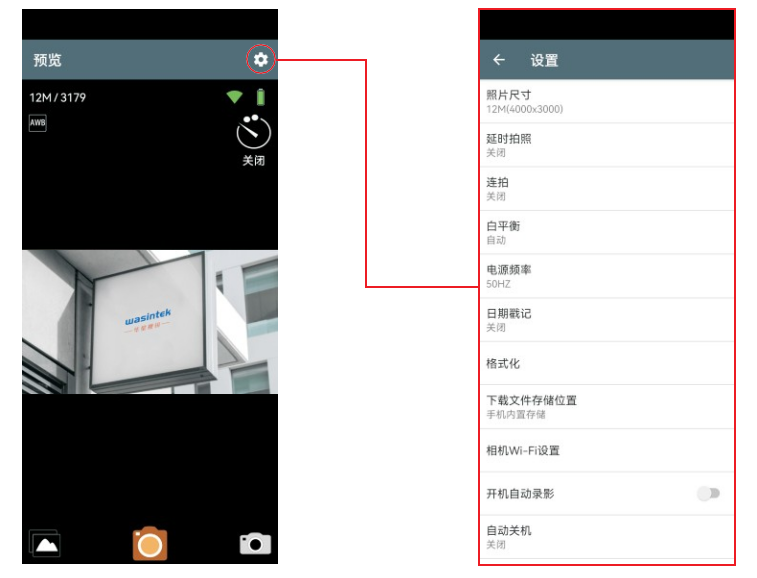
Note: The actual functions may vary depending on the expansion board used; please refer to the corresponding product specifications for details. The actual use shall prevail.
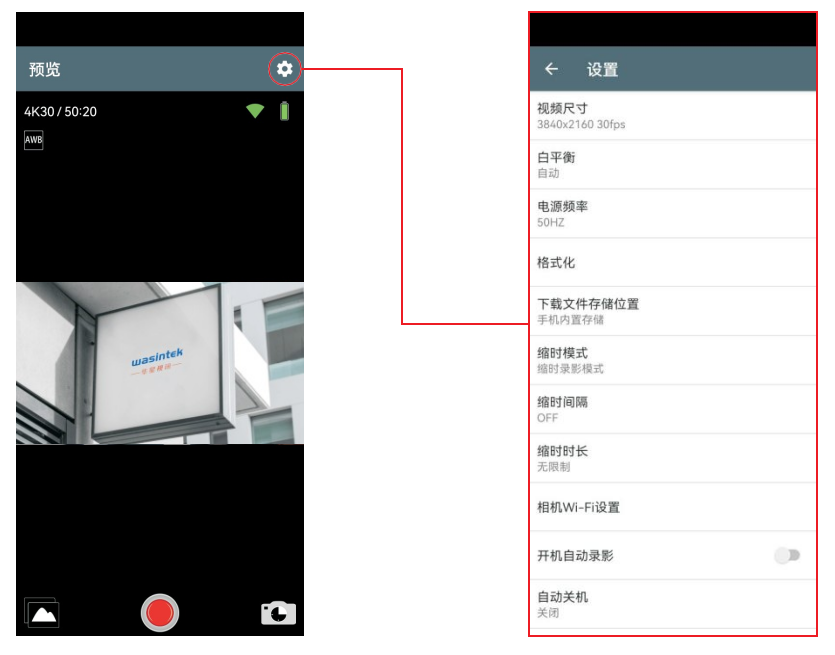
Click Mode to switch to Time-lapse Mode:
Click the icon in the upper right corner of the screen to enter the "Settings" interface, where you can set video size, white balance, time-lapse mode, time-lapse interval, time-lapse duration, start recording, automatic shutdown, view device version number, viewAPPVersion and other functions.
Through the "Settings" interface, you can set the time-lapse mode to photo mode. This mode will change the time-lapse file from a single video to an image sequence. The overall operation is the same as the video mode.
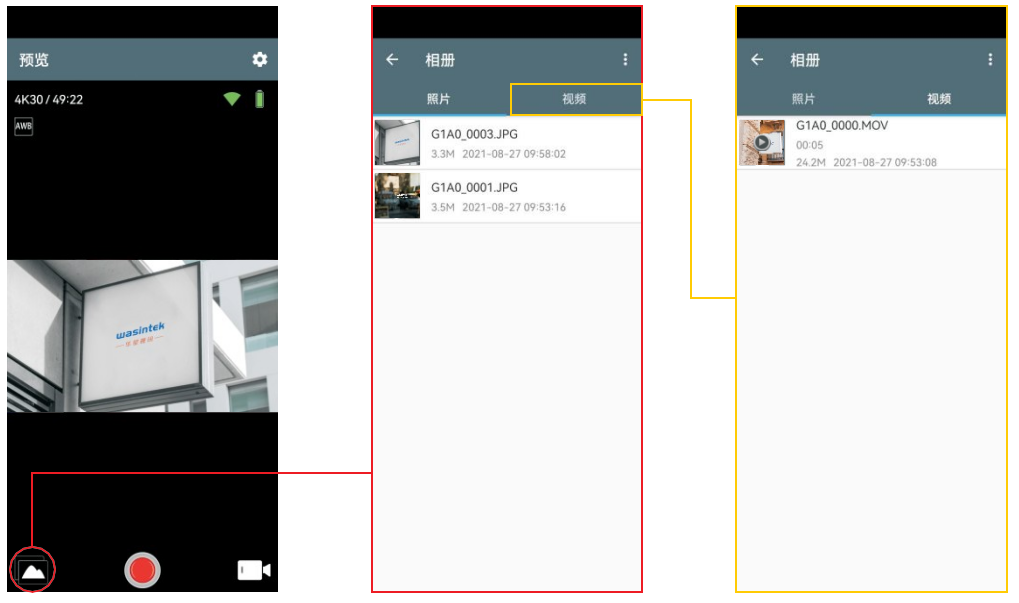
Playback interface: In preview mode, click the icon in the lower left corner of the screen to enter the playback interface. If there are no videos or pictures in the card of the current device, the playback interface will be empty; if there are files in the card of the current device, they will all be displayed after entering the playback interface. In addition, basic information such as the space occupied by the pictures or videos and the shooting time will be displayed below the file name. Click a file to play it back.
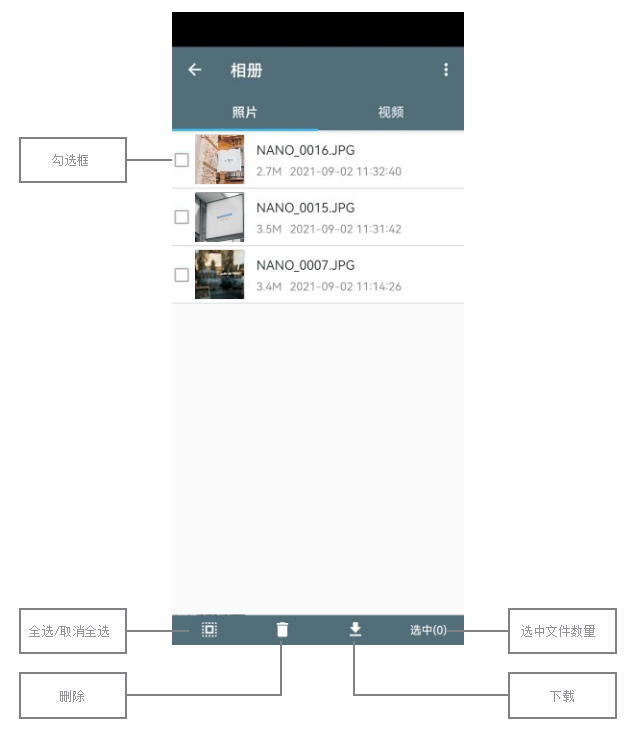
Long press on the displayed file to display a check box, an action bar, and a selected prompt box. You can delete or download the file by selecting it. The downloaded file will be stored in the memory of the connected device.
Use the phone's built-in "Back" button or gesture to return to the preview interface.APPOn the home page, you can see the devices you have added and the photos and videos you have downloaded to your local computer.