
G1 Camera Module Wi-Fi App Connection Guide
G1 Camera Module Wi-Fi App Connection Guide
The G1 camera module, paired with the Wi-Fi extension board, supports single-band 2.4GHz or 5GHz wireless Wi-Fi. Through Wi-Fi, the G1 camera module connects to the mobile app to preview the camera feed, control photo and video recording, and adjust parameters. Below are the steps to connect the G1 camera module to the app via Wi-Fi:
1. Download the G1 camera module app
Click to download the Android version of the G1 camera module app. For iOS, search for "Aikucam" in the App Store.
2. Turn on the Wi-Fi of the G1 camera module
This guide uses the G1-W-V6.3 Wi-Fi board. With the camera module powered on, press and hold the OK / Confirm button on the main board for 3 seconds to toggle Wi-Fi on or off.
The red LED blinks when Wi-Fi is on, and stays solid once the connection is established.
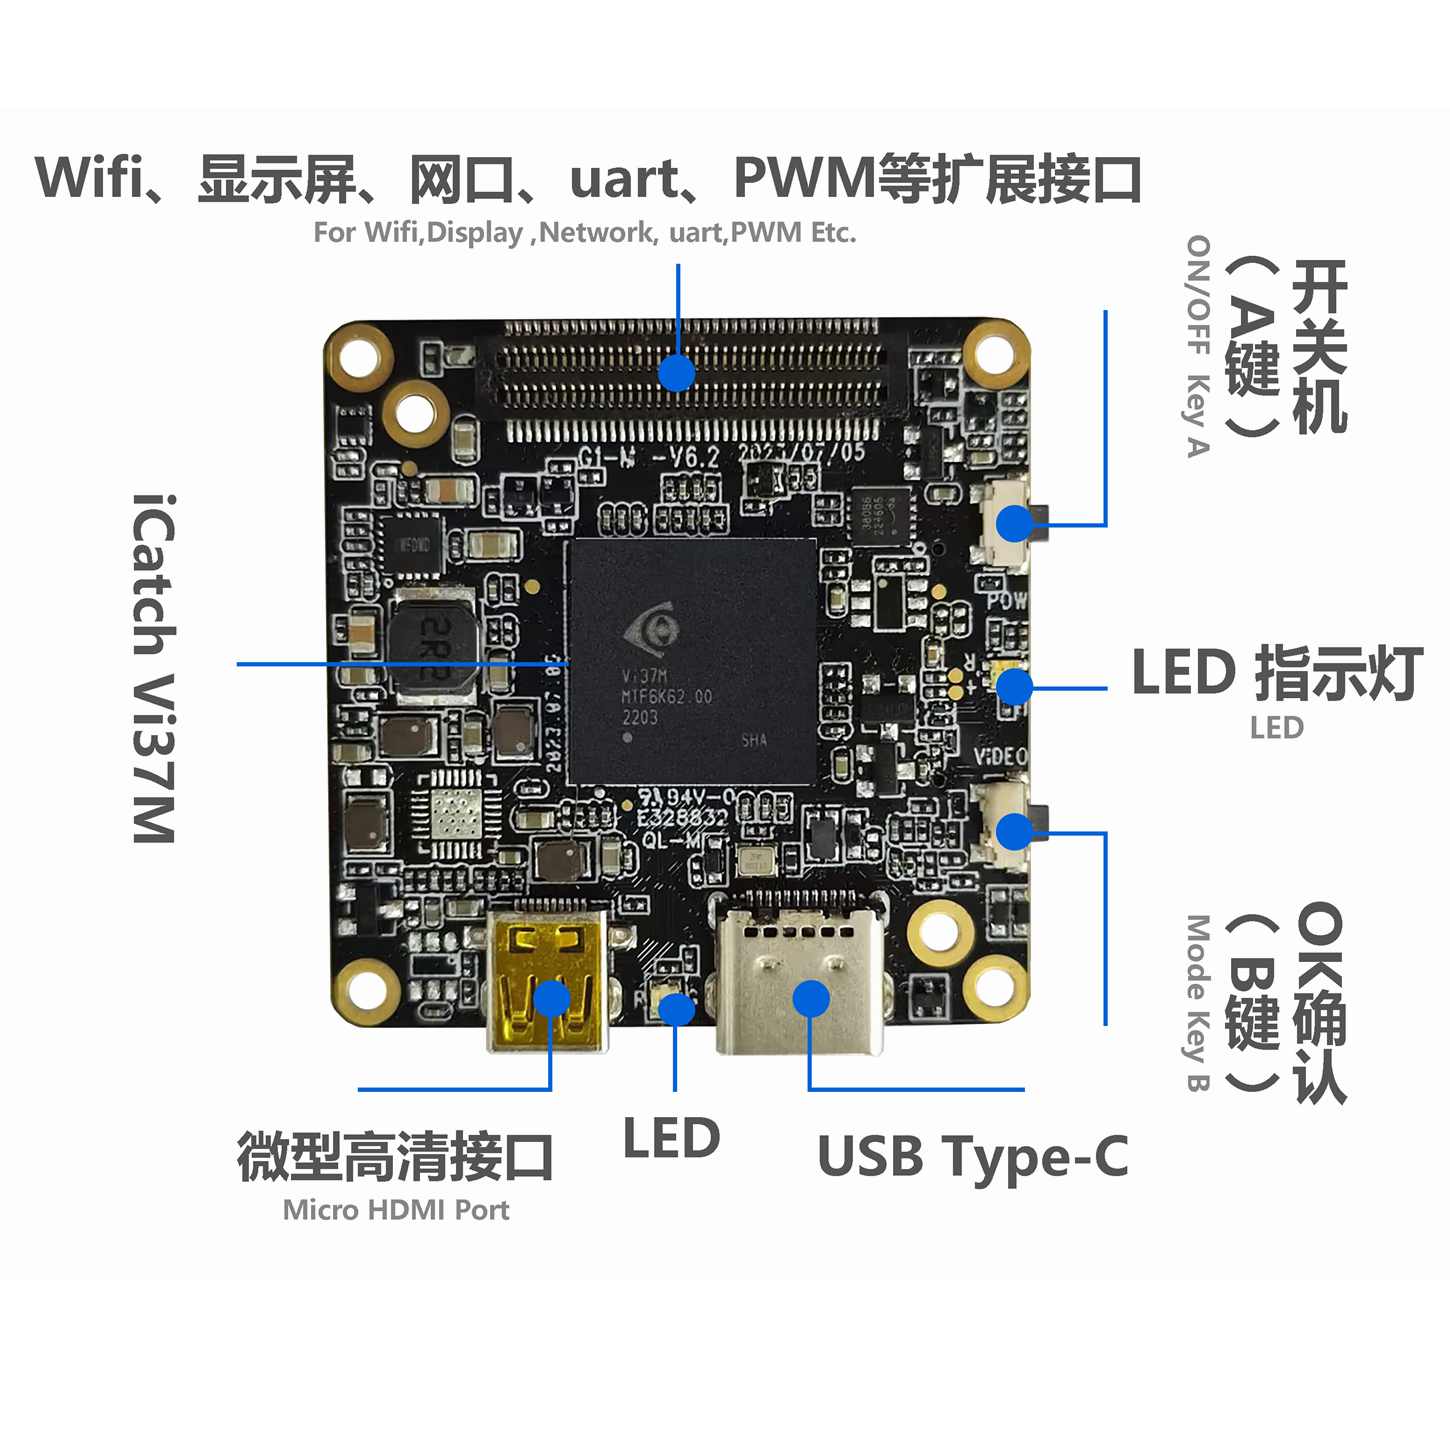
▲G1-M-V6.2 Camera Main Board
3. Connect the phone to the camera module's Wi-Fi
Turn on Wi-Fi on your phone, find the network whose name starts with "G1", enter the default password "12345678", and tap Connect. After the connection succeeds, the indicator LED on the Wi-Fi board stays solid red (V3.0 Wi-Fi board).
The Wi-Fi of the G1 camera module works in AP mode by default. When the phone pops up "This WLAN has no Internet access. Keep using this WLAN?", tap "Use"; otherwise the app will not work.

4. Add the camera in the app
Open the G1 camera module app, tap "Add Camera", and select "Wi-Fi Connection". Once connected, the app enters video recording mode by default and displays the live preview.

See also: instructions for using the G1 camera module app.
Note: When the G1 camera module is connected to a computer via USB, it enters USB flash drive mode or PC-CAM mode, and Wi-Fi cannot be turned on.